Custom UI Guide - Compose Screen
This guide provides an example of how to customize the screens using the Embedded Payment SDK with Jetpack Compose. The example demonstrates how to override the default screens provided by the SDK.
You can find the example code for screen provider here via github (opens in a new tab)
UI States
Throughout the lifecycle of a PoiRequest, the Embedded Payment SDK shows different screens. These are the UI states:
| Screen | Description |
|---|---|
PreparationScreen | Preparing for the profile & reader. |
AwaitingCardScreen | Awaiting card tapping. |
ProcessingScreen | Online processing PoiRequest. |
SchemeSensoryBrandingScreen | Upon a transaction approval, show per card scheme sensory animation. |
SignatureScreen | Signature on screen. |
ResultScreen | Approved / declined result, only shown when enableResultScreen is on. |
The default UI as following
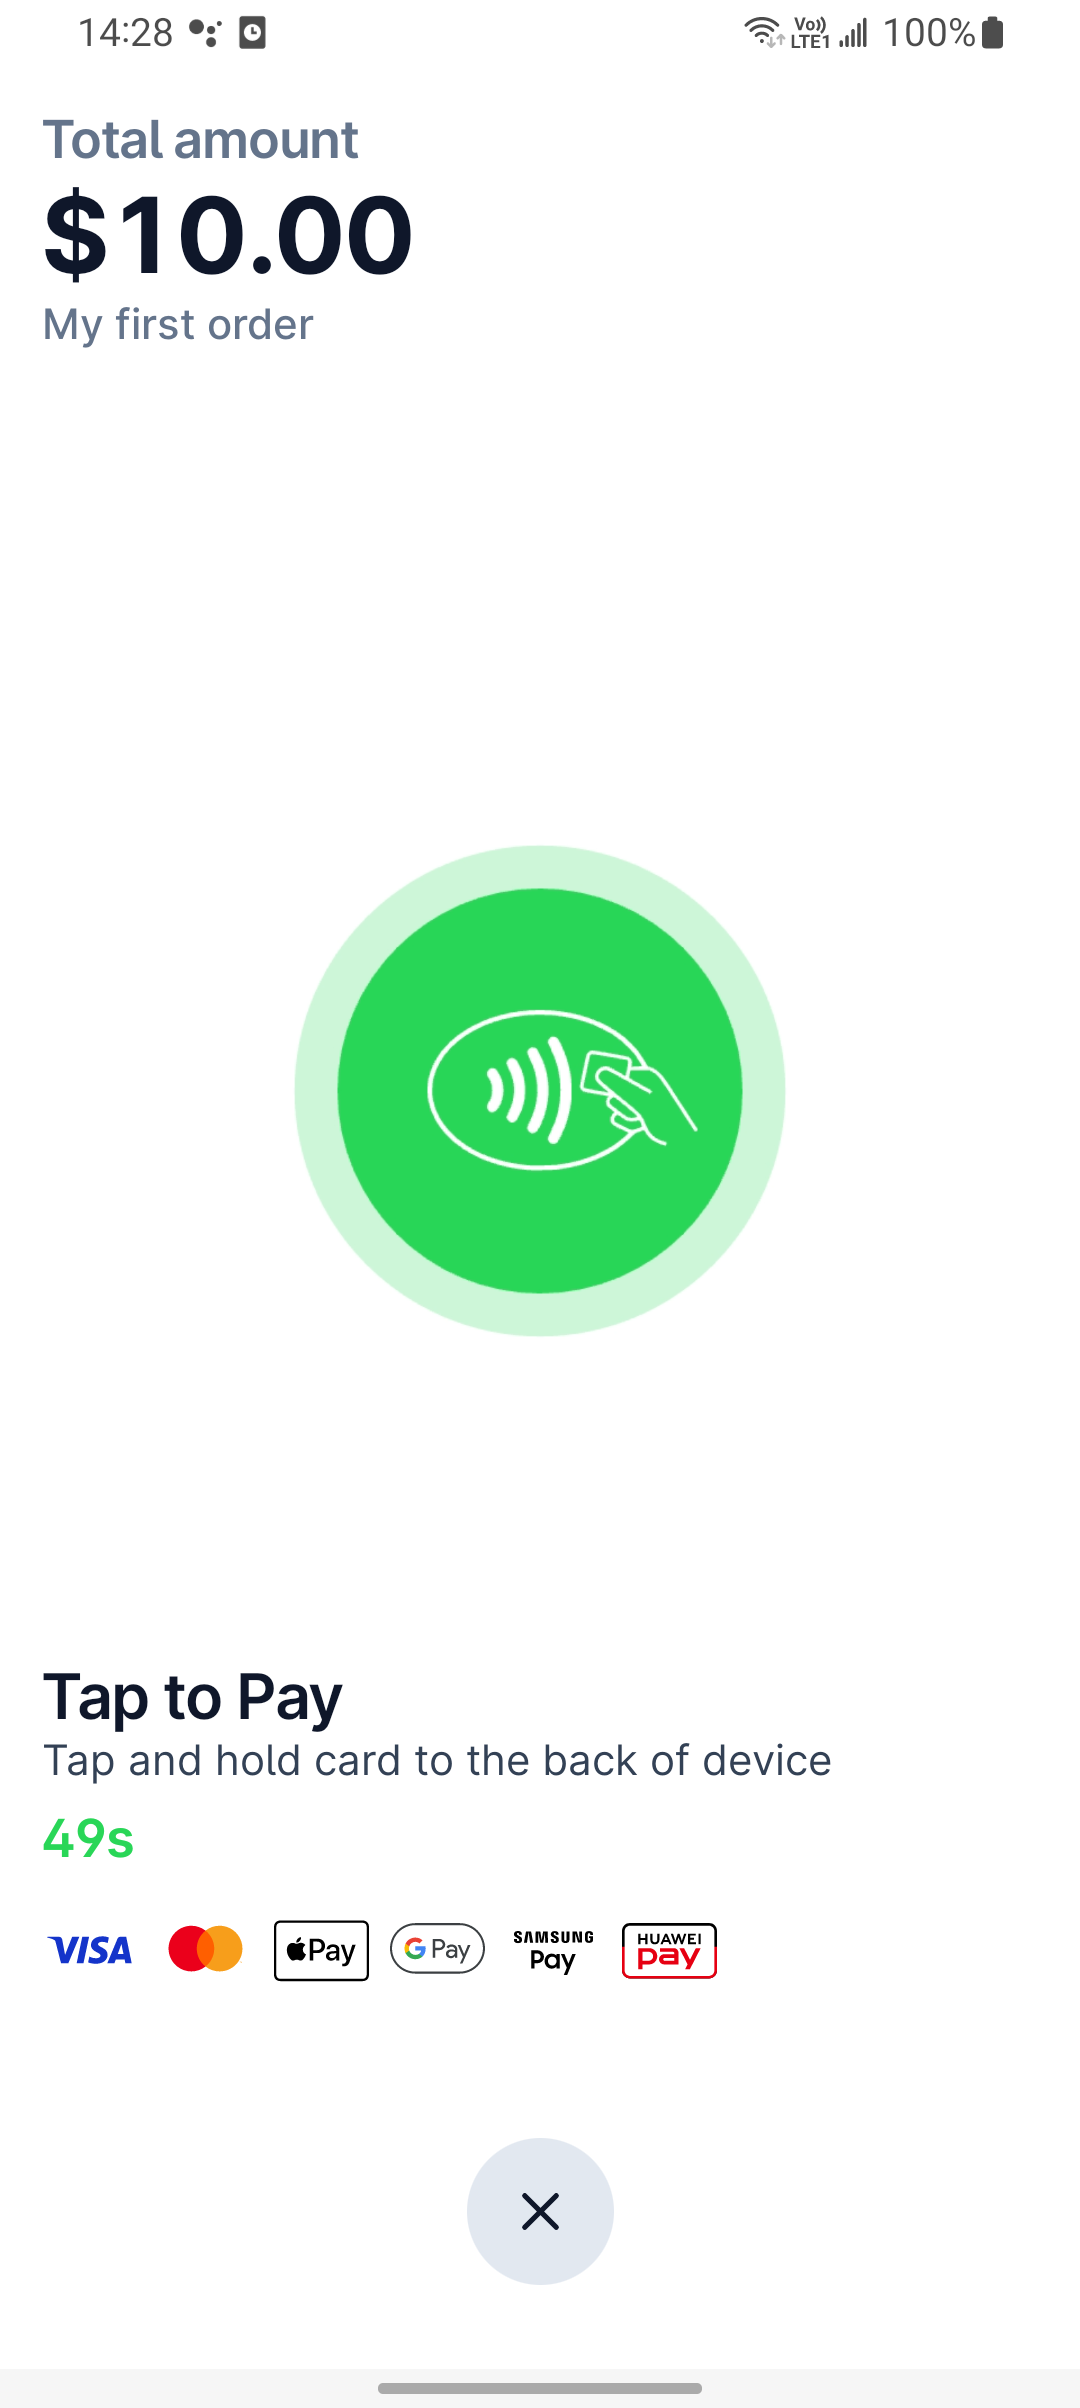
AwaitingCardScreen
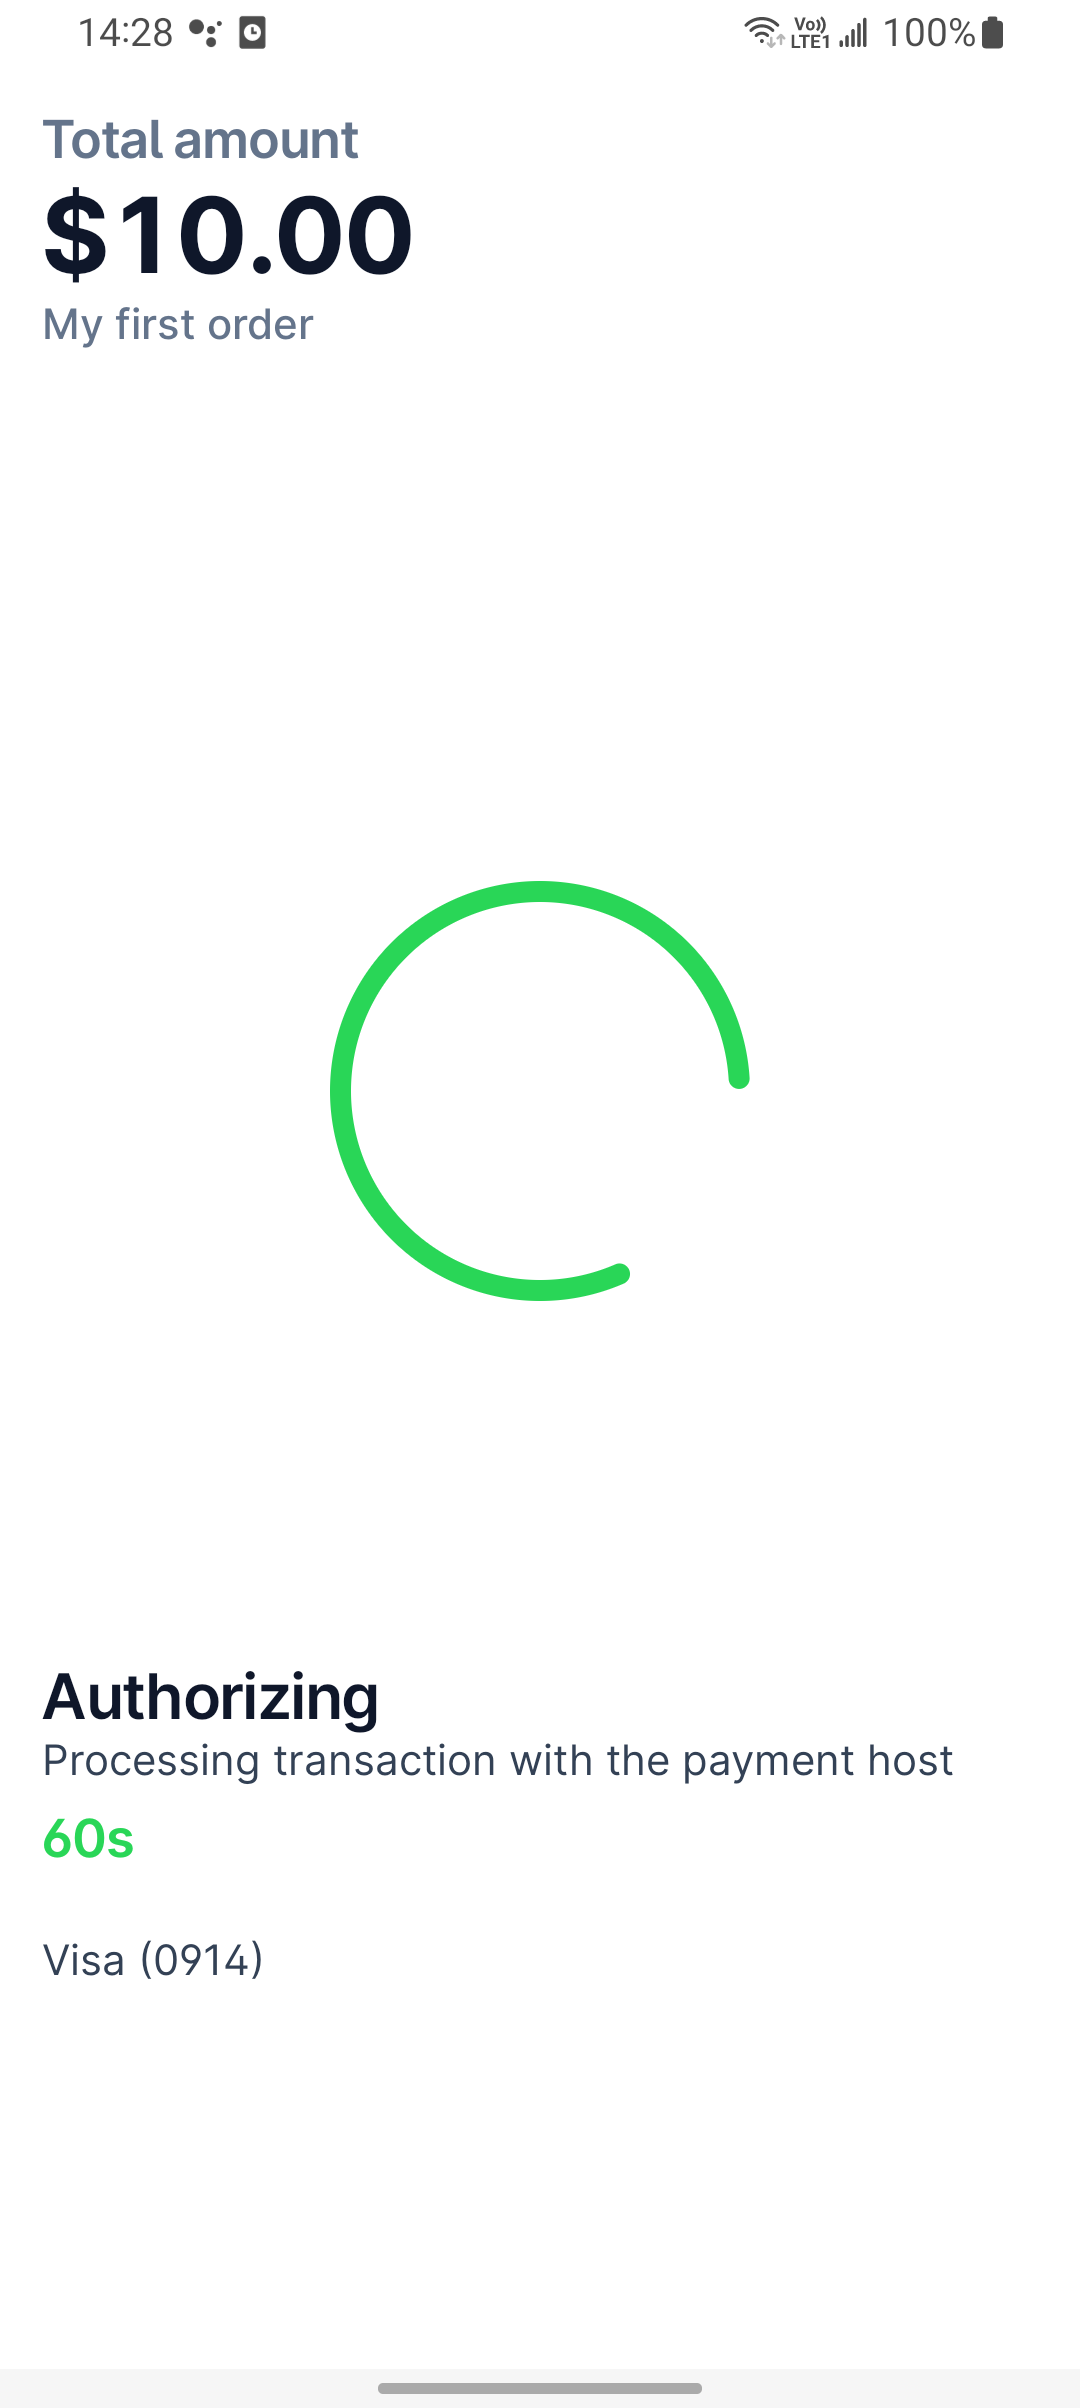
ProcessingScreen
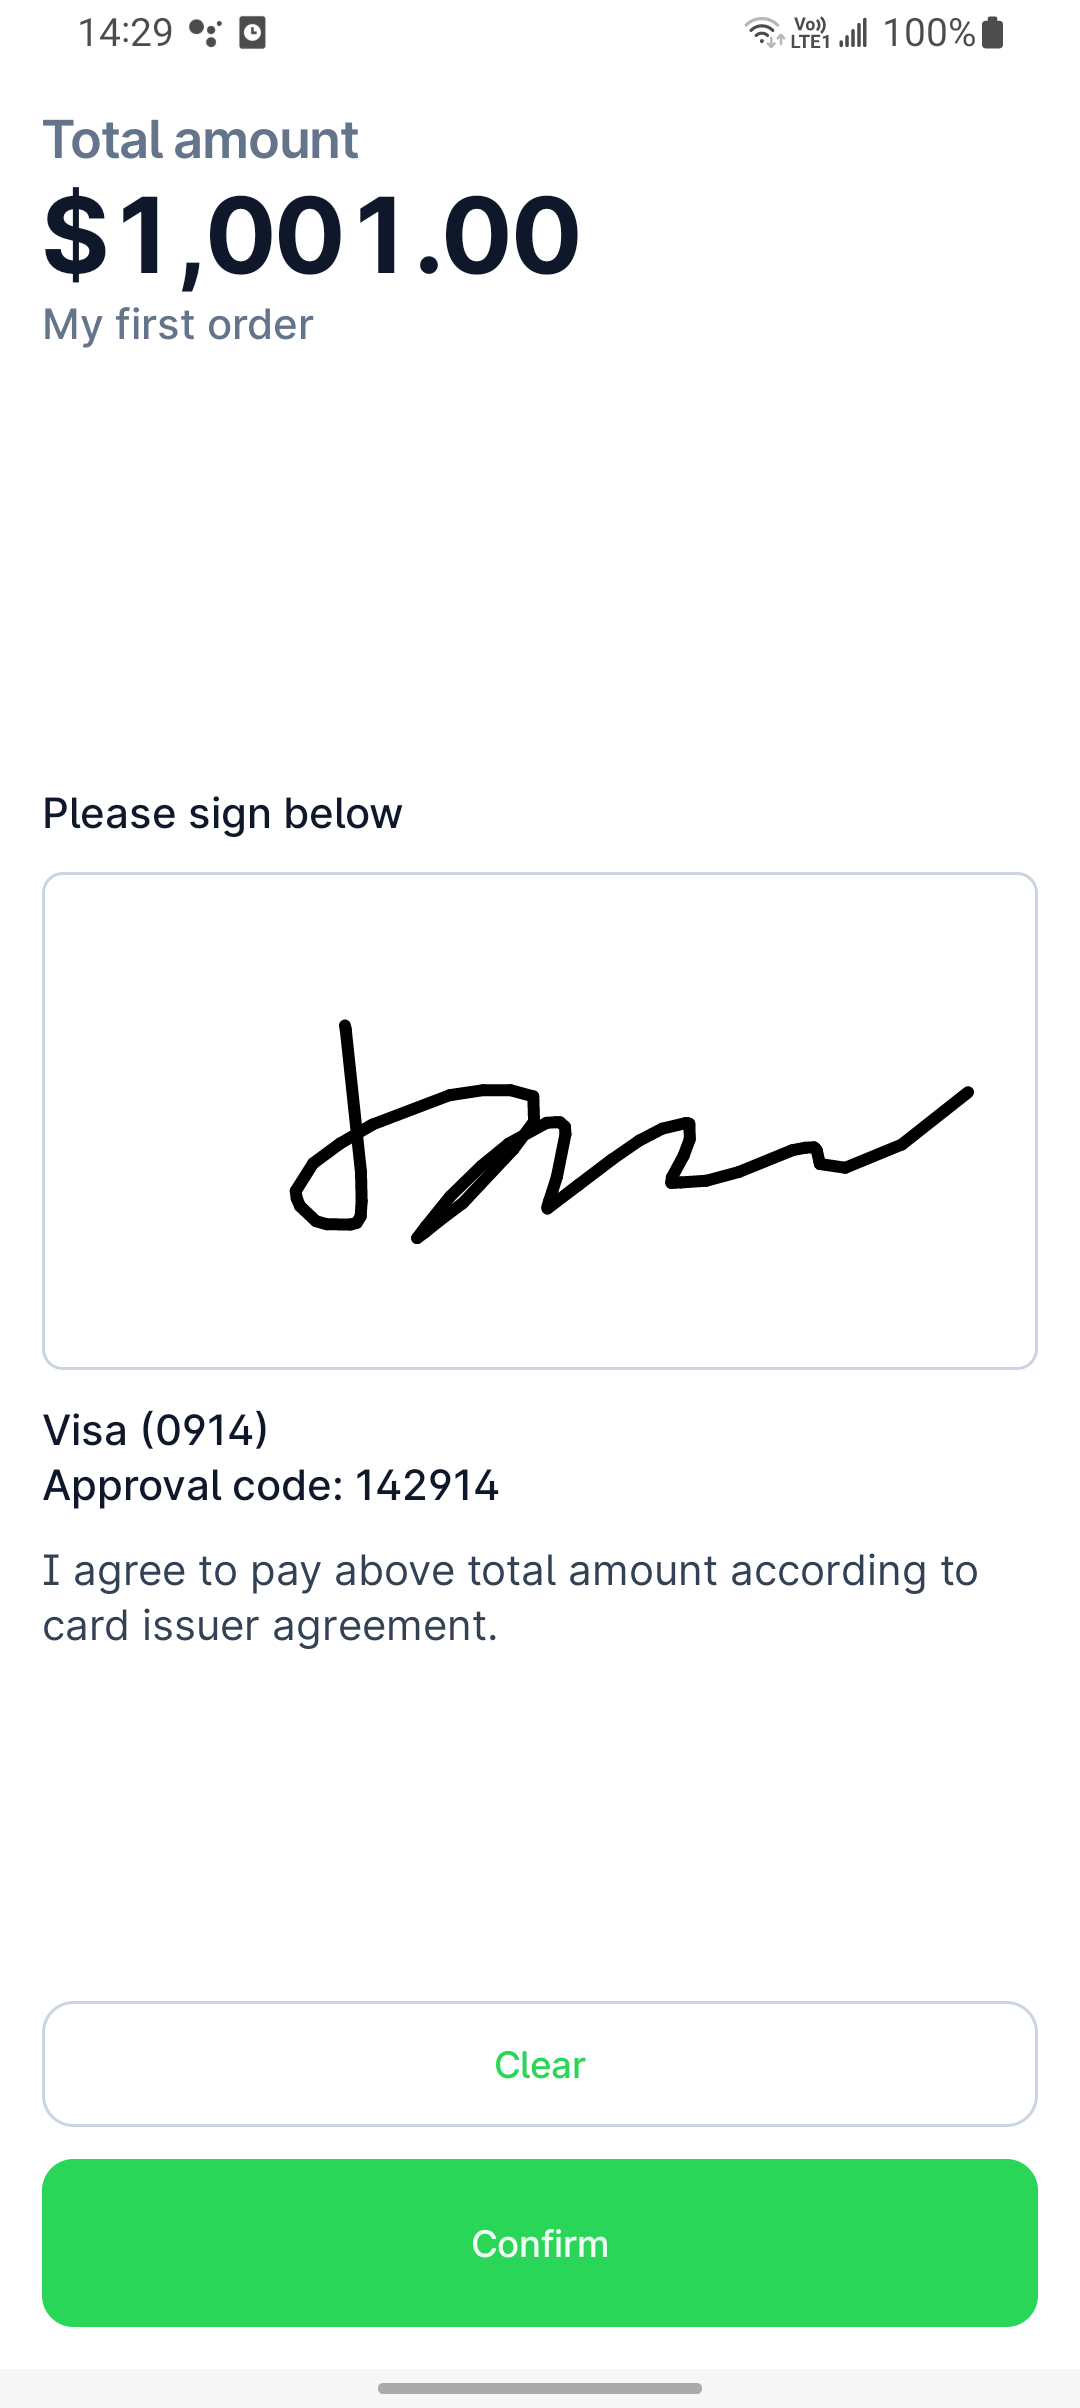
SignatureScreen
Result screen
The result screen is off by default. Turn it on during setup:
HeadlessSetup.initialSetup(context) {
    enableResultScreen = true
}
When it is on, the SDK keeps the activity open after the transaction is decided and shows ResultScreen. onDone finishes the SDK and returns the result to your app. onRetry is offered for a declined result and re-runs the transaction without leaving the SDK. To customize it, override ResultScreen in your ScreenProvider:
@Composable
override fun ResultScreen(
    result: UiState.Result,
    onDone: () -> Unit,
    onRetry: () -> Unit,
) {
    // result.outcome is the WrappedResult<Transaction> that will be returned to your app
}
Retry reasons
While waiting for a card, the SDK may ask the cardholder to try again, for example when the card moved too soon or isn't supported. The awaiting state UiState.Awaiting.Retryable carries a reason: RetryReason, so your screen can branch on a stable value instead of the displayed text.
RetryReason | When |
|---|---|
CARD_CONNECTION_LOST | The card moved away before the read completed. |
SEE_PHONE | The cardholder needs to complete an action on their phone. |
UNSUPPORTED_PAYMENT | The card's payment method is not accepted for this request. |
CONTACTLESS_NOT_SUPPORTED | The card does not support contactless. |
CONTACTLESS_LIMIT_EXCEEDED | The amount is above the contactless limit. |
CVM_NOT_COMPLETED | Cardholder verification was not completed. |
CARD_DATA_INVALID | The card data could not be read correctly. |
CARD_NOT_USABLE | The card cannot be used. |
CARD_AUTHENTICATION_FAILED | Card authentication failed. |
APPLICATION_NOT_CONFIGURED | No matching application is configured for this card. |
CAPK_ERROR | A CA public key problem occurred. |
CONFIGURATION_ERROR | A terminal configuration problem occurred. |
READER_ERROR | A reader error occurred. |
KERNEL_ERROR | A kernel error occurred. |
OTHER | Fallback, every retry normally sets an explicit reason. |
val state by awaitingFlow.collectAsStateWithLifecycle(UiState.Preparing.Idle)
val retryable = state as? UiState.Awaiting.Retryable
when (retryable?.reason) {
    RetryReason.UNSUPPORTED_PAYMENT -> Text("This card is not accepted, please use another card")
    RetryReason.CARD_CONNECTION_LOST -> Text("Hold the card still")
    else -> Unit
}
Walkthrough
To customize the screen with the SDK,
Create a custom HeadlessActivity
class HeadlessImplWithScreenProvider : HeadlessActivity()Remember to register the new activity in the app's AndroidManifest.xml
Override the flag and ScreenProvider
From this activity, override both the experimentalScreenProvider = true and wire up a ScreenProvider
class HeadlessImplWithScreenProvider : HeadlessActivity() {
    override val experimentalScreenProvider = true
    override val screenProvider = object : ScreenProvider() {}
}
Customize your screen
From the ScreenProvider, you can find different screens (as a composable function) to override.
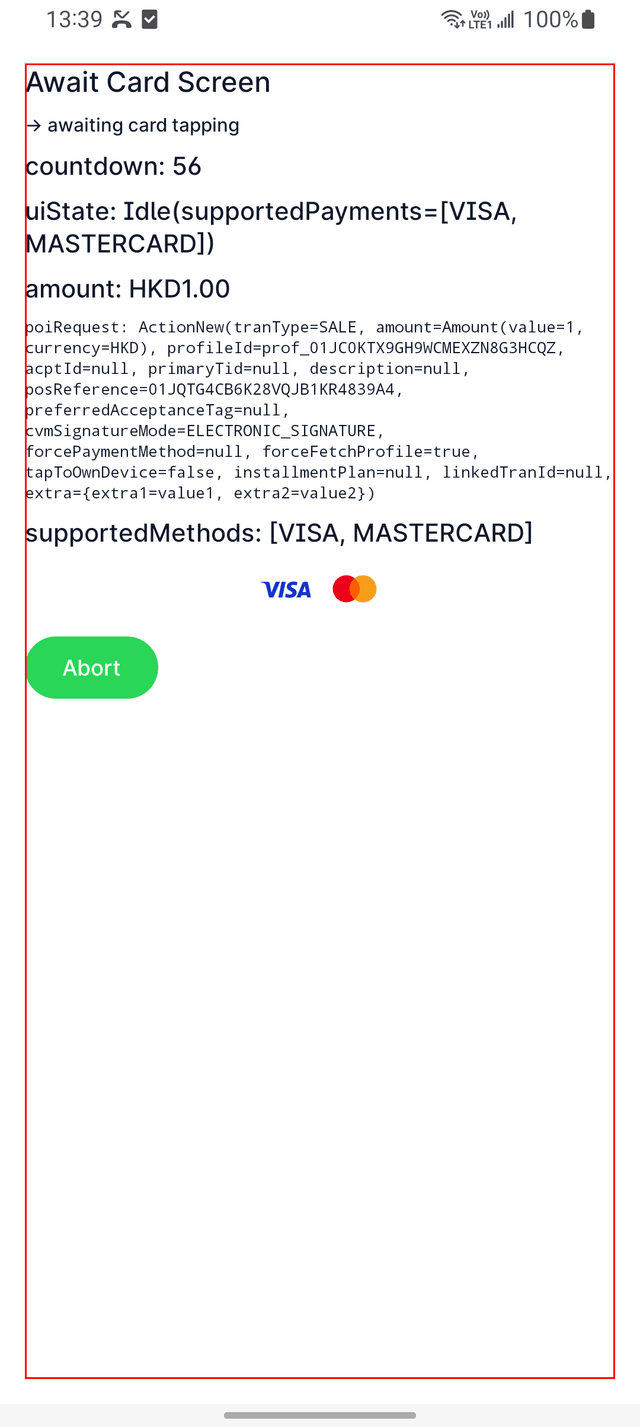
For example, if you want to have a custom await card screen:
@Composable
override fun AwaitingCardScreen(
    poiRequest: PoiRequest.ActionNew,
    awaitingFlow: Flow<UiState.Awaiting>,
    supportedMethods: List<PaymentMethod>,
    countdownFlow: StateFlow<Int>,
    onAbort: () -> Unit
) {
    val countdownSec by countdownFlow.collectAsStateWithLifecycle()
    val uiState by awaitingFlow.collectAsStateWithLifecycle(UiState.Preparing.Idle)
    Shell {
        Title(text = "Await Card Screen")
        Desc(text = "-> awaiting card tapping")
        Text(text = "countdown: $countdownSec")
        Text(text = "uiState: $uiState")
        AmountText(poiRequest.amount)
        PoiRequestText(poiRequest)
        Text(text = "supportedMethods: $supportedMethods")
        FlowRow(
            modifier = Modifier.fillMaxWidth(),
            verticalArrangement = Arrangement.spacedBy(HeadlessTheme.spacing.xs2),
            horizontalArrangement = Arrangement.spacedBy(
                HeadlessTheme.spacing.xs,
                Alignment.CenterHorizontally
            )
        ) {
            supportedMethods.forEach { it.Icon() }
        }
        Button(onClick = onAbort) {
            Text(text = "Abort")
        }
    }
}
Then the UI would look like: